Setting up BuddyBoss Platform on WordPress is straightforward, but getting the initial configuration right is important. Whether you’re creating a membership website, an online course portal, a coaching community, or a private social network, BuddyBoss provides the tools needed to bring your vision to life. However, many beginners struggle during the initial configuration because missing just a few important settings can lead to broken registration pages, missing community features, or compatibility issues later on.
If you’re wondering how to set up BuddyBoss Platform correctly from the start, this guide walks you through every essential step. From preparing your WordPress website and installing the BuddyBoss Theme to configuring community features and avoiding common mistakes, you’ll learn everything needed to launch your community with confidence.
1. What Is BuddyBoss Platform?
BuddyBoss Platform is a WordPress plugin for building online communities. It adds features such as member profiles, activity feeds, groups, private messaging, forums, and notifications to your website.
You can use it to create membership sites, coaching communities, online course platforms, and private social networks.
Core Features & Integrations:
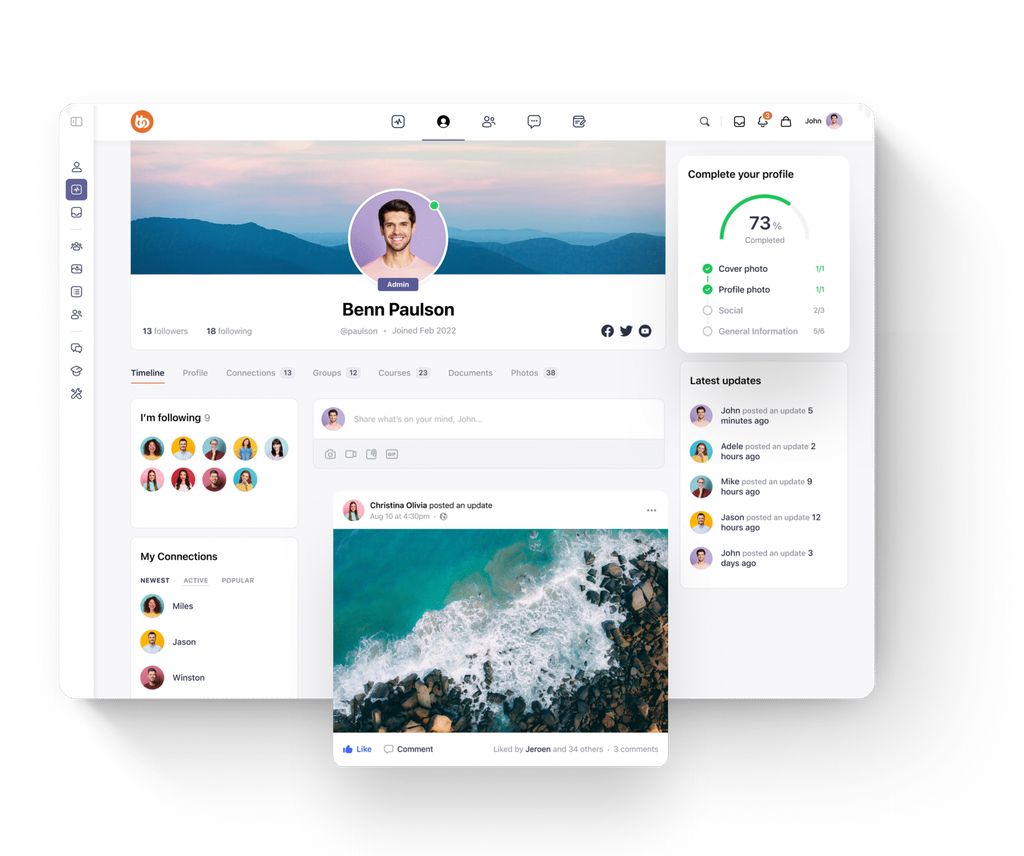
- Member Profiles & Directories: Create member profiles, customize profile fields, and let users find other members.
- Activity Feeds: Let members share updates, comment on posts, mention others, and upload media.
- Groups: Create public, private, or hidden groups for different communities or interests.
- Messaging & Notifications: Allow members to send private messages and receive updates about community activity.
- LMS & E-Commerce Integrations: Connect your community with tools such as LearnDash, LifterLMS, WooCommerce, and MemberPress.
BuddyBoss Platform can work with compatible WordPress themes, so the BuddyBoss Theme is not required. However, the BuddyBoss Theme is built specifically for the BuddyBoss Platform and provides a more consistent design across profiles, groups, activity feeds, forums, and other community pages.
2. What You Need Before Getting Started
Before installing BuddyBoss Platform, make sure your WordPress site and hosting environment are ready. Preparing these basics first can help prevent compatibility issues and make the setup process easier.
2.1. WordPress Requirements
BuddyBoss Platform runs on WordPress, so start with a clean and up-to-date installation.
Before installing BuddyBoss, check that your site has:
- The latest stable version of WordPress
- A supported PHP version
- A supported MySQL or MariaDB version
- HTTPS with a valid SSL certificate
- Enough PHP memory for your site’s plugins and features
Check the current BuddyBoss system requirements before installation, as recommended software versions can change over time.
2.2. Choose Reliable Hosting
Hosting can significantly impact BuddyBoss performance. Community sites typically handle logged-in users, activity feeds, messages, media, and other dynamic content, which can require more server resources than a basic WordPress blog.
When choosing hosting, look for:
- Good page-loading performance
- WordPress optimization
- Automatic backups
- Reliable security features
- Resources that can scale as your community grows
If you expect a large number of active members, choose hosting that can handle increased traffic and logged-in activity.
2.3. Get BuddyBoss Theme and Platform
BuddyBoss Platform is the community plugin, while BuddyBoss Theme provides the design and layouts built specifically for the BuddyBoss ecosystem. You can use the BuddyBoss Platform without the BuddyBoss Theme, but the Theme is recommended for a more consistent BuddyBoss experience.
Before you begin, prepare:
- A BuddyBoss account
- An active BuddyBoss Theme license, if you plan to use the Theme
- The BuddyBoss Theme ZIP file
- The BuddyBoss Platform plugin
- A BuddyBoss Child Theme, if you plan to customize the Theme
A child theme helps protect your customizations when the parent theme is updated.
2.4. Configure Basic WordPress Settings
A few WordPress settings should be configured before you start building your BuddyBoss community.
Enable Pretty Permalinks: Go to Settings → Permalinks and select Post name. This creates cleaner URLs for your WordPress pages and community content.
Set the Correct Timezone: Go to Settings → General and select the timezone that matches your location. This helps WordPress display activity timestamps and scheduled content correctly.
Allow User Registration: Go to Settings → General and enable “Anyone can register” to allow visitors to create accounts on your site. Without this setting, new visitors won’t be able to sign up as community members.
Configure Email Delivery: BuddyBoss uses email for account verification, password resets, group invitations, and notifications. Make sure your WordPress site can send emails reliably before launch. If necessary, configure an SMTP solution to improve email delivery.
3. Step-by-Step Guide to Set Up BuddyBoss Platform
Once your WordPress site is ready, follow these steps to install BuddyBoss Platform and configure the core community features.
3.1. Step 1 – Prepare Your WordPress Site
If WordPress is not already installed, install it through your hosting provider’s control panel or one-click installer.
Before continuing:
- Update WordPress to the latest stable version.
- Remove unused plugins and themes.
- Configure your site title and basic settings.
If WordPress is already set up, you can move directly to the next step.
3.2. Step 2 – Install BuddyBoss Theme
BuddyBoss Theme is designed specifically for BuddyBoss Platform and provides layouts for profiles, activity feeds, groups, forums, and other community features.
To install it:
- Go to Appearance → Themes.
- Click Add New → Upload Theme.
- Upload the BuddyBoss Theme ZIP file.
- Install and activate the theme.
- Install and activate the BuddyBoss Child Theme if you plan to customise it.
Using a child theme helps preserve your customizations when the parent theme is updated.
3.3. Step 3 – Install BuddyBoss Platform
Next, install the plugin that provides the core community functionality.
- Go to Plugins → Add New.
- Upload the BuddyBoss Platform ZIP file.
- Click Install Now.
- Activate the plugin.
After activation, BuddyBoss adds its settings and community-related options to your WordPress dashboard. From there, you can manage features such as members, groups, activity feeds, forums, media, notifications, and emails.
3.4. Step 4 – Run the BuddyBoss Setup Wizard
After activating BuddyBoss, use the setup wizard to configure the basic structure of your community.
The wizard can help you set up pages and enable features such as:
- Activity Feed
- Members Directory
- Groups
- User Profiles
- Registration and Login
- Notifications
- Messaging
Let the wizard create the required pages instead of assigning them manually. Before completing the setup, review the selected features and turn off anything your community does not need.
3.5. Step 5 – Configure Community Features
Once the setup wizard is complete, go to BuddyBoss → Settings and configure the features your members will use.
Focus on the following:
- Member Profiles: Add profile fields that are relevant to your community.
- Activity Feeds: Enable posts, comments, media uploads, and moderation options as needed.
- Groups: Choose whether groups should be public, private, or hidden.
- Private Messaging: Enable direct communication between members if your community requires it.
- Notifications: Configure on-site and email notifications for messages, group activity, mentions, and other important updates.
Only enable features that support your community’s goals. Keeping unnecessary modules disabled can make the site easier to manage.
3.6. Step 6 – Configure Registration and Login
Review your registration and login pages before inviting members to your site.
Keep the registration form simple and ask only for the information you actually need. Also check that password recovery and account verification emails work correctly.
For security, consider enabling:
- Email verification
- Strong password requirements
- Google reCAPTCHA
- Anti-spam protection
Create a test account and complete the full registration and login process before moving on.
3.7. Step 7 – Customize the BuddyBoss Theme
Customize the Theme to match your brand and make the community easy to navigate.
Focus on:
- Logo and branding: Add your logo and brand colors.
- Typography: Choose readable fonts for desktop and mobile.
- Navigation: Keep the main menu simple and prioritize important pages such as Members, Groups, Courses, and Forums.
- Mobile layout: Check profiles, groups, feeds, and other key pages on smaller screens.
Avoid adding too many menu items or design elements that could make the community harder to use.
3.8. Step 8 – Test Your Website
Before launching your community, test the main member workflows with a test account.
Check:
- Registration and login
- Password reset
- Profile editing
- Activity posts and comments
- Media uploads
- Group creation and membership
- Private messaging
- Notifications
- Mobile layouts
If you use WooCommerce, LearnDash, MemberPress, or other integrations, test those workflows as well.
Fix any issues you find before inviting real members to your community.
4. Best Practices for Managing a BuddyBoss Community
Once your BuddyBoss site is up and running, a few simple practices can help keep it secure, responsive, and easier to manage.
4.1. Keep WordPress and BuddyBoss Updated
Keep WordPress, BuddyBoss Platform, BuddyBoss Theme, and your other plugins up to date. Before updating, check for compatibility issues and back up your site.
For major changes, test the update on a staging site first. This gives you a safe place to identify conflicts before they affect your live community.
4.2. Improve Site Performance
BuddyBoss sites can become resource-intensive because they handle logged-in users, activity feeds, messages, media, and other dynamic content.
To keep your site responsive, consider:
- Page and object caching
- Image optimization
- A Content Delivery Network (CDN)
- Database cleanup and optimization
- Reliable WordPress hosting
Focus on the areas that have the biggest impact on your site’s actual performance rather than adding unnecessary optimization tools.
4.3. Secure Member Accounts and Community Data
A community site contains user accounts and member-generated content, so security should be part of your regular maintenance.
At a minimum:
- Use strong administrator passwords.
- Enable two-factor authentication where available.
- Keep WordPress, BuddyBoss, and other plugins updated.
- Schedule regular backups.
- Use a security solution to monitor suspicious activity.
4.4. Keep Your Community Structure Simple
Set up your main navigation, member roles, groups, categories, and privacy settings before inviting members.
Avoid creating too many groups or menu items at the beginning. A simple structure is easier for new members to understand and easier for you to manage as the community grows.
4.5. Test Changes Before Applying Them to Your Live Site
Use a staging environment when making major changes to your BuddyBoss site, especially before updating the Theme, Platform, or several plugins at once.
After each major change, test key member workflows, including registration, login, profiles, groups, activity feeds, messaging, and notifications.
5. Recommended Plugins for BuddyBoss Platform
BuddyBoss Platform provides the core features needed to build an online community. Depending on your goals, you can extend your site with plugins for eCommerce, memberships, or online learning.
5.1. BuddyBoss Theme
The BuddyBoss Theme is a strong choice if you want to build your community around the BuddyBoss ecosystem. It is designed to work with BuddyBoss Platform and provides layouts for member profiles, activity feeds, groups, forums, and directories. The Theme also gives you more control over your site’s branding and navigation while keeping the community experience consistent across desktop and mobile devices.
5.2. WooCommerce
WooCommerce is worth considering if you plan to sell products, subscriptions, memberships, or digital downloads through your community website. It adds eCommerce functionality to WordPress while allowing you to keep your store and community on the same site. This makes it a useful option for businesses that combine community access with paid products or services.
5.3. MemberPress
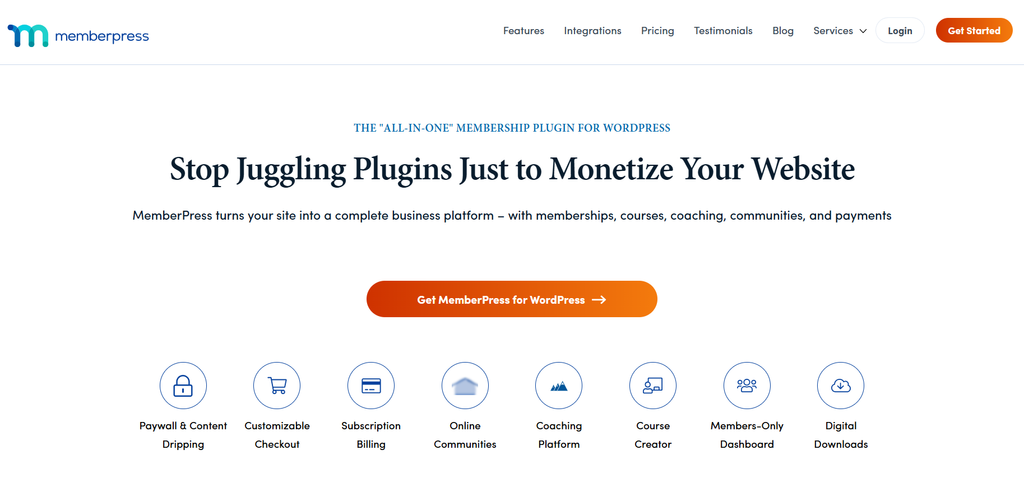
MemberPress is a good option for websites that need paid membership levels and content restrictions. You can create membership plans, control access to specific content, and manage recurring subscriptions. When used alongside BuddyBoss, it can help you build a private community where members receive access based on their membership level.
5.4. LearnDash
LearnDash is a useful addition if your BuddyBoss site focuses on online courses or learning communities. It provides tools for creating courses, lessons, quizzes, and certificates, while BuddyBoss adds the social and community features around that content. Together, they can work well for online schools, coaching programs, and membership-based learning platforms.
6. FAQs
6.1. Is BuddyBoss Platform free?
Yes. BuddyBoss Platform is a free WordPress plugin. If you want a more integrated design and additional customization options, you can also use the premium BuddyBoss Theme.
6.2. Do I need the BuddyBoss Theme to use BuddyBoss Platform?
No. BuddyBoss Platform can work with compatible WordPress themes. However, the BuddyBoss Theme is designed specifically for BuddyBoss Platform and provides a more consistent design and user experience.
6.3. Can BuddyBoss Platform work with WooCommerce and LearnDash?
Yes. BuddyBoss Platform integrates with popular WordPress plugins such as WooCommerce, LearnDash, and MemberPress, as well as other tools, allowing you to add eCommerce, membership, or online learning features to your community.
6.4. How long does it take to set up BuddyBoss Platform?
For a beginner, the initial BuddyBoss Platform setup can take about 1 to 3 hours, depending on the website’s size and the level of customisation required.
6.5. How much does the BuddyBoss Theme cost?
The BuddyBoss Theme is available through premium licensing options that include updates and support. If you are looking for a more affordable way to access premium WordPress themes and plugins without purchasing each product individually, PluginPro offers flexible options, including a $4.5 per-item plan and membership plans for users who need access to multiple products.
7. Conclusion
Properly setting up the BuddyBoss Platform gives you a solid foundation for building and managing an online community. Start with a prepared WordPress site, install BuddyBoss Platform and the Theme, configure the features your members need, and test the main user workflows before launch.
As your community grows, keep WordPress and BuddyBoss updated, monitor performance, and add integrations such as WooCommerce, LearnDash, or MemberPress when needed.
Once the basic setup is complete, you can focus on customizing your community, adding content, and creating a better experience for your members.