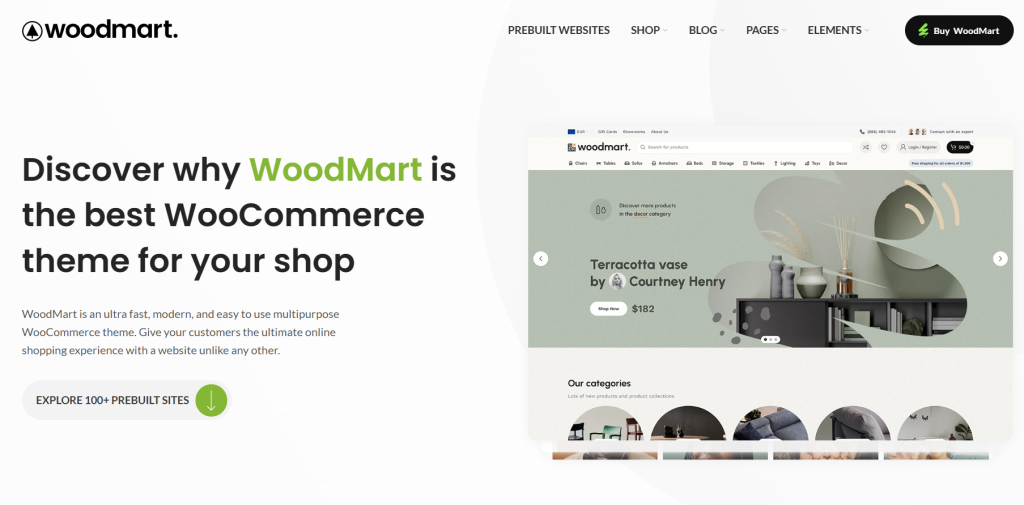
Setting up a professional WooCommerce store doesn’t have to start from scratch. One of the biggest advantages of using Woodmart is its one-click demo import feature, which provides an extensive collection of ready-made demo websites that can be imported in just a few clicks. Whether you’re building a fashion store, electronics shop, furniture website, or marketplace, importing demo content allows you to recreate a professionally designed layout in minutes.
However, many beginners encounter problems during the import process. Common issues include incomplete demo data, missing images, timeout errors, or layouts that don’t match the original preview. Fortunately, these problems are usually easy to avoid with the right preparation.
In this guide, you’ll learn how to import Woodmart demo content step by step, prevent the most common import errors, and ensure your website matches the original demo as closely as possible. Whether you’re setting up your first WooCommerce store or troubleshooting an existing installation, this tutorial covers everything you need for a smooth and successful demo import.
1. Why Import a Woodmart Demo?
Before learning how to import Woodmart demo, it’s worth understanding why demo content is so useful.
Instead of building every page manually, importing a demo gives you a complete website structure, including:
- Homepage layouts
- Product pages
- Shop pages
- Headers and footers
- Navigation menus
- Widgets
- Theme settings
- Sample products and categories
After the import, you only need to replace the demo content with your own products, images, and branding, saving hours or even days of design work.
2. Before You Start: How to Import Woodmart Demo Successfully
Proper preparation is the best way to avoid errors during the import process. Before you begin, complete the following checklist to import the WoodMart demo.
2.1 Install WordPress
Woodmart requires a clean and fully functional WordPress installation.
Ensure you have:
- The latest version of WordPress
- Administrator access
- HTTPS enabled (recommended)
- A reliable hosting provider
Using outdated WordPress versions may cause compatibility issues during demo import.
2.2 Install and Activate the Woodmart Theme
Download the latest installable Woodmart theme ZIP file from your preferred provider.
Then:
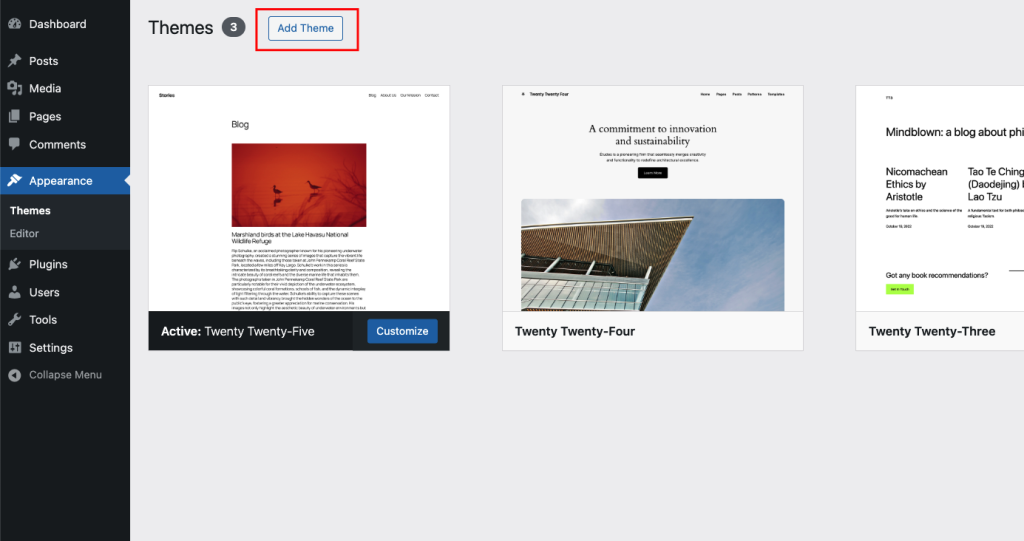
- Go to Appearance → Themes.
- Click Add New.
- Upload the Woodmart ZIP file.
- Activate the theme.
After activation, you’ll be prompted to install the required plugins.
2.3 Install Required Plugins
One of the most common reasons people struggle with importing the WoodMart demo is missing plugins.
Depending on the demo you choose, you’ll usually need:
- Woodmart Core
- WooCommerce
- Elementor or WPBakery Page Builder
- Slider Revolution (for demos that include sliders)
- Contact Form 7
If any required plugin is missing, some pages may not import correctly.
2.4 Check Your Server Requirements
Demo imports require more server resources than a normal WordPress installation.
For the best results, your hosting should meet these recommendations:
| Setting | Recommended Value |
| PHP Version | 8.1 or higher |
| PHP Memory Limit | 256 MB or higher |
| Max Execution Time | 300 seconds |
| Upload Max Filesize | 64 MB or higher |
| Post Max Size | 64 MB or higher |
If your hosting limits are too low, the import process may stop before completion.
3. How to Import Woodmart Demo Step by Step
Now that your website is ready, it’s time to learn how to import Woodmart demo correctly.
Step 1: Open the Demo Import Tool
From your WordPress dashboard:
Woodmart → Dashboard → Prebuilt Websites
Depending on your theme version, this section may also appear as Dummy Content or Import Demos.
Here you’ll see dozens of professionally designed demo websites covering different industries.
Step 2: Choose Your Preferred Demo
Browse the available demos and select one that best matches your business. Examples include: fashion, furniture, electronics, jewelry, cosmetics, grocery, marketplace, handmade, and sports.
Before importing, preview the demo to ensure it includes the layouts and features you need.
Choosing the right demo from the beginning reduces the amount of customization required later.
Step 3: Select the Import Type
When learning how to import Woodmart demo, you’ll usually see two import options.
Full Import
A full import installs: Pages, Products, Menus, Widgets, Theme Settings, Images, and Demo Content. This option is recommended for new websites.
Settings Only
If you’ve already created content and want to copy the demo’s design settings, importing only the theme settings is often a better choice.
Be careful not to overwrite important data on an existing live website.
Step 4: Start the Import Process
After selecting your preferred demo:
- Click Import.
- Wait for the process to finish.
- Do not refresh the browser.
- Avoid closing the tab during the import.
The import usually takes between 2 and 10 minutes, depending on:
- Server speed
- Internet connection
- Demo size
- Hosting performance
When complete, you’ll see a confirmation message indicating that the import finished successfully.
Step 5: Verify Your Website
After importing, visit the front end of your website.
Check that:
- The homepage loads correctly.
- Menus are displayed properly.
- Product pages work.
- Images appear correctly.
- Header and footer match the demo.
- Widgets display as expected.
If everything looks correct, your demo website is ready for customization and WooCommerce configuration.
Pro Tip: Before making major customizations, create a full website backup or snapshot. This allows you to restore the imported demo quickly if future theme updates, plugin conflicts, or design changes cause unexpected issues. If you’re experimenting with different Woodmart demos, perform each import on a staging website instead of your live store. This lets you compare layouts and test customizations without affecting your customers or existing content.
4. Common Errors When Importing Woodmart Demo
Although the process is straightforward, problems can occasionally occur. Here are the most common ones. Based on our experience testing Woodmart across multiple hosting environments, including shared hosting, VPS, and managed WordPress hosting, most demo import failures are caused by insufficient server resources or missing required plugins rather than problems with the Woodmart theme itself. Checking these areas first usually resolves the issue much faster than reinstalling the theme.
4.1 Demo Import Stops Halfway
Possible causes:
- Low PHP memory limit
- Maximum execution time exceeded
- Slow hosting
- Firewall restrictions
Increasing your PHP limits usually resolves this issue.
4.2 Missing Images
Sometimes imported demo images don’t appear.
Possible reasons include:
- External image downloads were blocked.
- The server timed out.
- Image import failed.
In most cases, rerunning the import or regenerating thumbnails fixes the problem.
4.3 Homepage Doesn’t Match the Demo
This usually happens because:
- The homepage wasn’t assigned correctly.
- Required plugins are missing.
- Theme settings weren’t imported.
Go to Settings → Reading and verify that the correct homepage is selected.
4.4 Missing Layout or Styling
If your pages load but don’t look like the demo, the page builder or theme settings may not have been imported correctly.
Check the following:
- Elementor or WPBakery is installed and activated.
- The Woodmart Core plugin is active.
- Theme settings were imported successfully.
- CSS files have been regenerated.
If you’re using Elementor, go to Elementor → Tools and click Regenerate CSS & Data. This often resolves styling issues after importing demo content.
5. What to Do After Importing the Woodmart Demo
Successfully learning how to import Woodmart demo is only the first step. Before launching your website, spend some time replacing the demo content with your own information.
5.1 Replace Demo Products
Demo products are included for layout purposes only. Remove them and add your own:
- Product images
- Titles
- Descriptions
- Prices
- Categories
- Attributes
If you’re migrating from another store, consider importing your products using WooCommerce’s built-in CSV importer.
5.2 Customize Your Branding
To make your store unique, update the branding elements.
These typically include:
- Site logo
- Favicon
- Brand colors
- Typography
- Header layout
- Footer content
WoodMart offers extensive customization options through the Theme Settings panel, enabling you to personalize your site without coding.
5.3 Configure WooCommerce Settings
Before accepting orders, review your WooCommerce configuration.
Important settings include:
- Store address
- Currency
- Shipping zones
- Tax settings
- Payment gateways
- Email notifications
Testing the checkout process ensures customers can complete purchases without issues.
5.4 Remove Unused Demo Content
Demo websites often include sample pages, blog posts, forms, and categories that aren’t needed.
Cleaning them up offers several benefits:
- A more organized dashboard
- Better SEO
- Smaller database size
- Easier website management
Delete any unused products, pages, menus, or widgets before launching your store. It’s also a good idea to regenerate your SEO metadata and XML sitemap after removing demo content. This helps search engines index only your real pages and prevents unnecessary sample content from appearing in search results.
6. Best Practices When Learning How to Import Woodmart Demo
Following a few best practices can save you time and prevent common problems when learning how to import A few simple steps before importing a WoodMart demo can help prevent conflicts and make the setup process much easier.
6.1 Start with a Fresh WordPress Installation
WoodMart demos work best on a clean WordPress installation. Importing demo content into an existing store can result in duplicate pages, menu conflicts, or changes to existing theme settings.
If you’re redesigning an existing website, test the import on a staging site first. This gives you a safe environment to check the demo before applying any changes to your live store.
6.2 Keep WordPress and Plugins Updated
Before starting the import, make sure WordPress, WoodMart, WoodMart Core, WooCommerce, and your page builder are up to date. If you’re using Elementor or WPBakery, check its version as well.
Keeping these components updated can help prevent compatibility issues and import errors caused by outdated theme or plugin files.
6.3 Do Not Interrupt the Import Process
Once you start the import, let it run until the process is complete. Avoid refreshing the page, closing the browser tab, logging out of the WordPress dashboard, or restarting the server while the import is running.
If the process is interrupted, some demo content, images, or settings may not be imported correctly.
6.4 Back Up Your Website
If you’re importing a demo into an existing website, create a full backup of your files and database beforehand. This gives you a restore point in case the imported content conflicts with your existing setup.
For a live WooCommerce store, a staging site is still the safer option for testing the demo before making changes to the production website.
7. Recommended Plugins to Use with Woodmart
7.1 Elementor Pro
Elementor Pro works perfectly with Elementor-based Woodmart demos, making it easy to customize pages, headers, footers, product templates, and landing pages without touching code. It’s an excellent choice if you want to personalize the imported demo while maintaining the theme’s design quality.
7.2 Rank Math SEO
After importing a demo, many pages still require SEO optimization. Rank Math helps optimize metadata, schema markup, XML sitemaps, and WooCommerce product pages, making it easier for your new store to perform well in search results.
7.3 WP Rocket
Imported demo websites often include many images, CSS files, and JavaScript assets. WP Rocket improves loading speed through caching, file optimization, lazy loading, and database cleanup, helping maintain excellent Core Web Vitals.
7.4 All-in-One WP Migration
If you plan to move your completed Woodmart website to another hosting provider or create backup copies before making major changes, All-in-One WP Migration is a practical solution. It allows you to export and restore your entire WordPress website, helping protect your store before testing new demos, updating the theme, or performing large-scale customizations.
8. Frequently Asked Questions
1. Can I import a Woodmart demo on an existing WooCommerce website?
Yes, but you should proceed with caution. Importing demo content into an existing website may create duplicate pages, products, menus, or widgets, and may overwrite some theme settings. If your store is already live, create a full backup or test the import on a staging site before making any changes.
2. Why is my Woodmart demo import failing or getting stuck?
If you’re having trouble importing the WoodMart demo, the issue is usually related to your hosting environment rather than the theme itself. Common causes include insufficient PHP memory, low execution time limits, missing required plugins, server timeouts, or security rules that block large imports. Verifying your server configuration and ensuring all required plugins are installed resolves most import failures.
3. Can I switch to a different Woodmart demo after importing one?
Yes, but importing another demo on the same installation isn’t usually recommended. A second import can overwrite theme settings and create duplicate content. If you want to compare different demo designs, it’s safer to use a staging environment or a fresh WordPress installation.
4. Do I need Elementor to import a Woodmart demo?
Not always. Some Woodmart demos are built with Elementor, while others use WPBakery Page Builder. Before importing, check which page builder your selected demo requires and install the appropriate plugin to ensure the layout displays correctly.
5. How much does Woodmart cost?
If you’re looking for an affordable way to use Woodmart, PluginPro offers GPL downloads starting from $4.5 per item. For users managing multiple WordPress websites, PluginPro Membership provides access to a much larger collection of premium themes and plugins under a single subscription.
9. Conclusion
Learning how to import Woodmart demo is one of the fastest ways to build a professional WooCommerce store. With just a few clicks, you can import a fully designed website complete with layouts, navigation, shop pages, and theme settings, giving you a solid foundation to customize.
To avoid errors, start with a clean WordPress installation, install all required plugins, verify that your server meets the recommended requirements, and avoid interrupting the import process. After the demo is installed, replace the sample content with your own products, branding, and business information before launching your site.
If you follow the steps outlined in this guide, you should have no trouble importing the WoodMart demo successfully. Taking extra time to prepare your website beforehand will help ensure a smooth import process and let you focus on what matters most building and growing your online store with WoodMart.
To get even more from your WooCommerce website, explore PluginPro’s collection of premium WordPress themes and plugins, including Woodmart, Elementor Pro, Rank Math SEO, WP Rocket, and many other essential tools. Whether you’re launching your first store or managing multiple client websites, PluginPro makes it easier to find the resources you need to build, customize, optimize, and maintain your WordPress projects.