Installing BuddyBoss Themes on WordPress is straightforward once you have the correct theme files and a compatible WordPress site. You’ll need to install the BuddyBoss Theme, activate the BuddyBoss Child Theme if you plan to customize your site, and install the BuddyBoss Platform plugin to enable community features.
In this guide, we’ll walk you through the process, from downloading the files and uploading the theme to configuring the essential settings and troubleshooting common installation issues.
1. What Is the BuddyBoss Theme?
BuddyBoss Theme is a WordPress theme designed for community, membership, and online learning websites. It works with the BuddyBoss Platform plugin and can integrate with tools such as LearnDash and WooCommerce.
Key features include:
- Community-focused layouts and member profiles
- Integration with BuddyBoss Platform and LearnDash
- Customizable navigation, headers, and site layouts
BuddyBoss Theme provides the site’s design and layout, while BuddyBoss Platform adds core community functionality and features.
2. Requirements Before Installing BuddyBoss Theme
Before installing BuddyBoss Theme, make sure your WordPress site meets the current BuddyBoss requirements and that you have administrator access to your WordPress dashboard.
You should also have a compatible WordPress hosting environment with enough server resources for your website.
| Requirement | Recommendation |
| WordPress | Use a current supported version |
| PHP | Check the current BuddyBoss requirements |
| Database | Check the current BuddyBoss requirements |
| Server resources | Make sure your hosting plan meets the site’s needs |
| SSL | Recommended |
| Hosting | Choose hosting suitable for your expected traffic |
Step 1: Download the BuddyBoss Theme Files
Log in to your BuddyBoss account and open the downloads section. Download the files you need for your installation:
- BuddyBoss Theme
- BuddyBoss Child Theme
- BuddyBoss Platform
Save the ZIP files somewhere easy to access. When installing the theme or plugin, upload the individual installation ZIP file rather than the full download package.
Step 2: Upload and Install the BuddyBoss Theme
Once you have the BuddyBoss Theme ZIP file, you can install it from your WordPress dashboard.
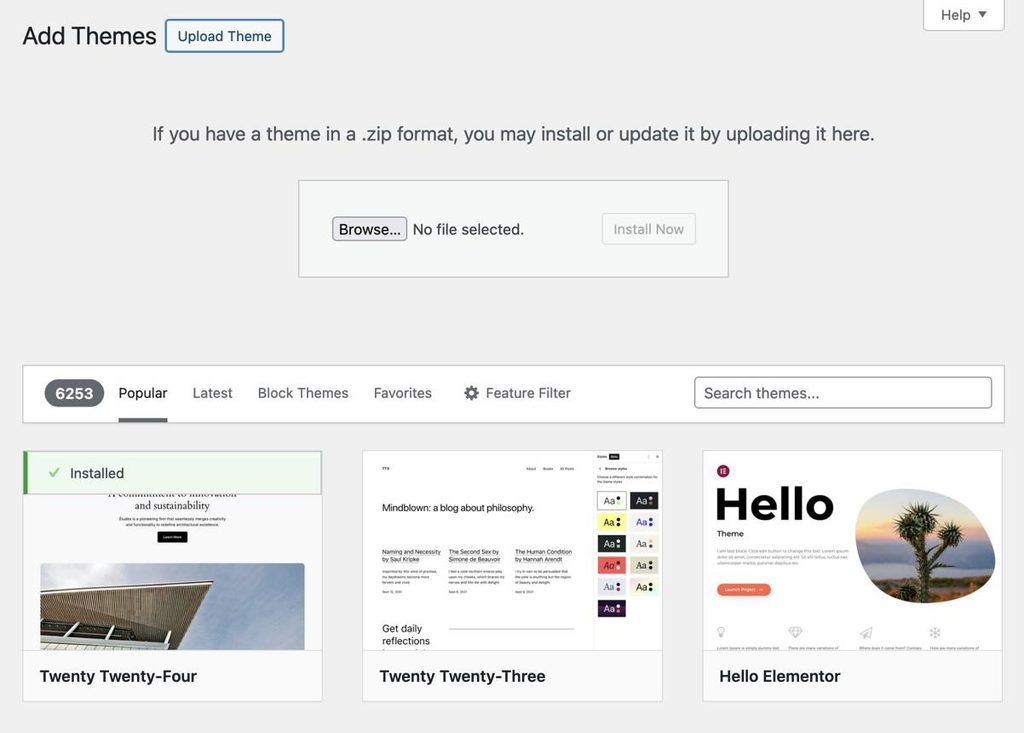
- Go to Appearance → Themes.
- Click Add New Theme.
- Select Upload Theme.
- Click Choose File and select the BuddyBoss Theme ZIP file.
- Click Install Now.
- Click Activate after the installation is complete.
Your BuddyBoss Theme is now installed and active.
If the upload fails: Make sure you are uploading the installable BuddyBoss Theme ZIP file. If you selected the correct file and the upload still fails, check your server’s PHP upload and memory limits or contact your hosting provider.
Step 3: Install the BuddyBoss Child Theme
A child theme is useful if you plan to customize BuddyBoss Theme. It allows you to keep custom changes separate from the parent theme, making them less likely to be overwritten when the parent theme is updated.
To install the BuddyBoss Child Theme:
- Go to Appearance → Themes.
- Click Add New Theme.
- Select Upload Theme.
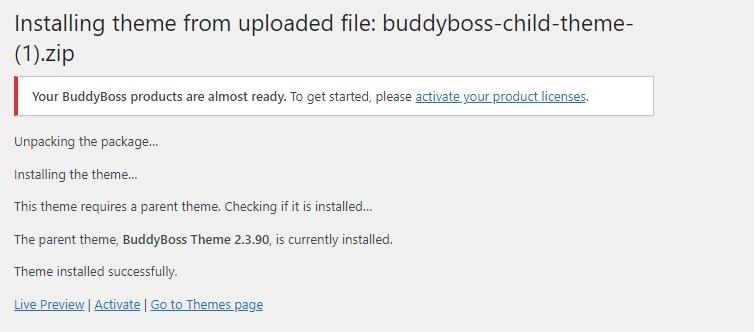
- Upload the BuddyBoss Child Theme ZIP file.
- Install and activate the child theme.
If you do not plan to customize theme files, you can skip this step and continue with the BuddyBoss Platform installation.
Step 4: Install the BuddyBoss Platform Plugin
BuddyBoss Theme controls the design and layout of your website, while BuddyBoss Platform adds core community functionality. Install the Platform plugin to use features such as member profiles, groups, activity feeds, messaging, and media.
To install BuddyBoss Platform:
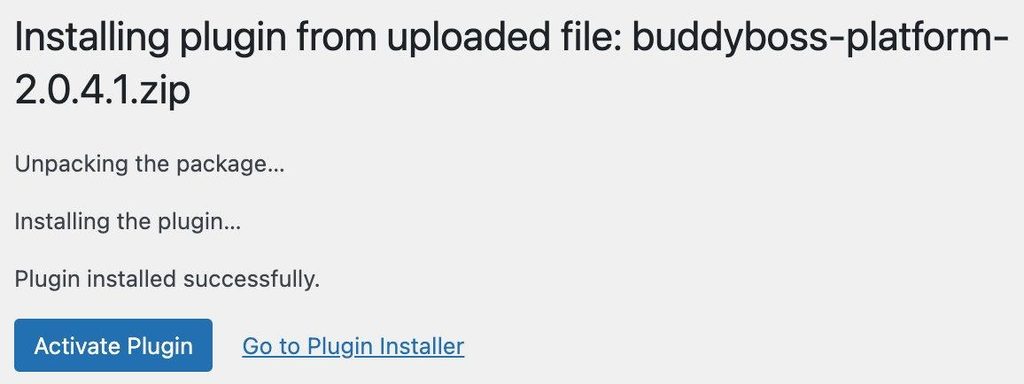
- Go to Plugins → Add New Plugin.
- Click Upload Plugin.
- Select the BuddyBoss Platform ZIP file.
- Click Install Now.
- Activate the plugin.
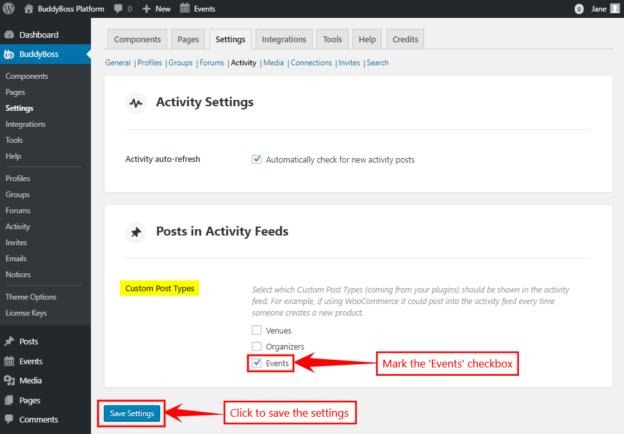
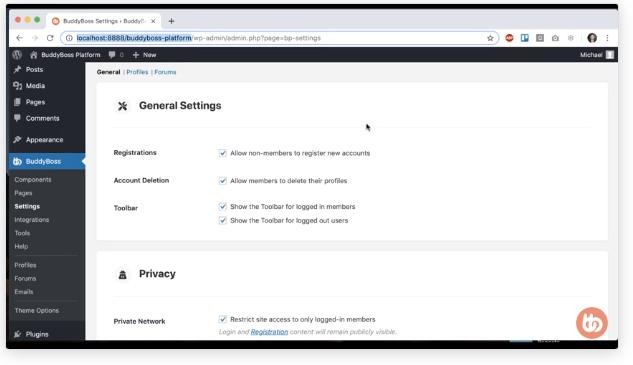
After activation, review the BuddyBoss settings and enable the community features your site needs.
Step 5: Import BuddyBoss Demo Content
If your BuddyBoss setup includes demo, starter, or pre-built layouts, you can use them to create an initial site structure instead of building every page from scratch.
Before importing, create a backup of your website and review the content that will be added. After the import is complete, replace the sample text, images, menus, and other content with your own.
If you are setting up a new site from scratch, you can also skip the demo content and build your pages manually.
Step 6: Configure the Basic BuddyBoss Theme Settings
After installing the theme and BuddyBoss Platform, configure the basic settings for your website.
Start with the following:
Logo and branding
Add your logo and configure the site’s basic colors and typography.
Header and navigation
Set up your navigation menus, search options, and other header elements.
Footer
Add your copyright information, contact details, and other relevant links.
Mobile layout
Check how your pages, menus, and community features appear on smaller screens. Test the site on desktop, tablet, and mobile before launch.
Step 7: Install Recommended Plugins
You can extend your BuddyBoss website with additional plugins based on the features you need.
| Plugin | Use Case |
| LearnDash | Online courses |
| WooCommerce | eCommerce |
| Rank Math | SEO |
Only install plugins that support your website’s actual requirements. A smaller, well-maintained plugin stack can make your site easier to manage and troubleshoot.
3. Troubleshooting Common BuddyBoss Theme Installation Issues
If you run into problems while installing BuddyBoss Theme, start by checking the theme file and your WordPress or hosting settings. The following fixes cover some of the most common installation issues.
3.1 BuddyBoss Theme ZIP File Cannot Be Uploaded
If WordPress rejects the BuddyBoss Theme ZIP file, first check that you selected the correct installation file.
Make sure that:
- You are uploading the BuddyBoss Theme ZIP file, not the full download package.
- Your WordPress site allows theme uploads.
- Your hosting account has enough PHP memory and upload capacity.
If the correct ZIP file still cannot be uploaded, contact your hosting provider and ask them to check the site’s PHP upload and memory limits.
3.2 White Screen After Installing BuddyBoss
A blank or white screen after activating the theme can be caused by a plugin conflict, a PHP error, or insufficient server resources.
Try these steps:
- Deactivate any plugins you installed or updated just before the problem appeared.
- Make sure WordPress, BuddyBoss Theme, and your plugins are up to date.
- Check your WordPress or hosting error logs for PHP errors.
- If the problem continues, contact your hosting provider or BuddyBoss support for further troubleshooting.
Avoid making changes to theme files until you identify the cause of the problem.
3.3 Theme and Plugin Conflicts
A plugin conflict can cause broken layouts, missing features, or unexpected behavior after installing BuddyBoss.
To find the conflicting plugin:
- Deactivate your plugins.
- Test the website with BuddyBoss Theme and the required BuddyBoss components active.
- Reactivate the plugins one at a time.
- Test the site after each activation.
When the problem returns, the last plugin you activated is a likely source of the conflict. Check its documentation or contact the plugin developer for compatibility information.
3.4 Demo Import Problems
If demo or starter content does not import correctly, check your WordPress and hosting environment first.
Common symptoms include:
- The import stops before completion.
- Some images or content are missing.
- Pages are not created correctly.
- The import process times out.
Create a backup before trying the import again. If the problem continues, ask your hosting provider to check server limits and review any relevant error logs.
3.5 Slow BuddyBoss Website
A new BuddyBoss installation may feel slow if the site has large images, too many plugins, limited hosting resources, or caching that is not configured correctly.
Start with these basic improvements:
- Compress large images before uploading them.
- Remove plugins you do not use.
- Keep WordPress, BuddyBoss, and plugins updated.
- Enable appropriate page or object caching.
- Choose hosting that can handle your expected community traffic.
4. Frequently Asked Questions
4.1 Can I Install BuddyBoss Theme Without BuddyBoss Platform?
Yes. You can install and activate BuddyBoss Theme without BuddyBoss Platform, but you will not have access to the community features provided by the platform plugin. If you are building a community or membership website, you will typically need both the theme and platform.
4.2 Do I Need a BuddyBoss Child Theme?
Not necessarily. A child theme is recommended if you plan to customize theme files, CSS, templates, or functions. If you only use the built-in BuddyBoss settings and do not modify theme files, you can use the parent theme without a child theme.
4.3 How Much Does BuddyBoss Theme Cost?
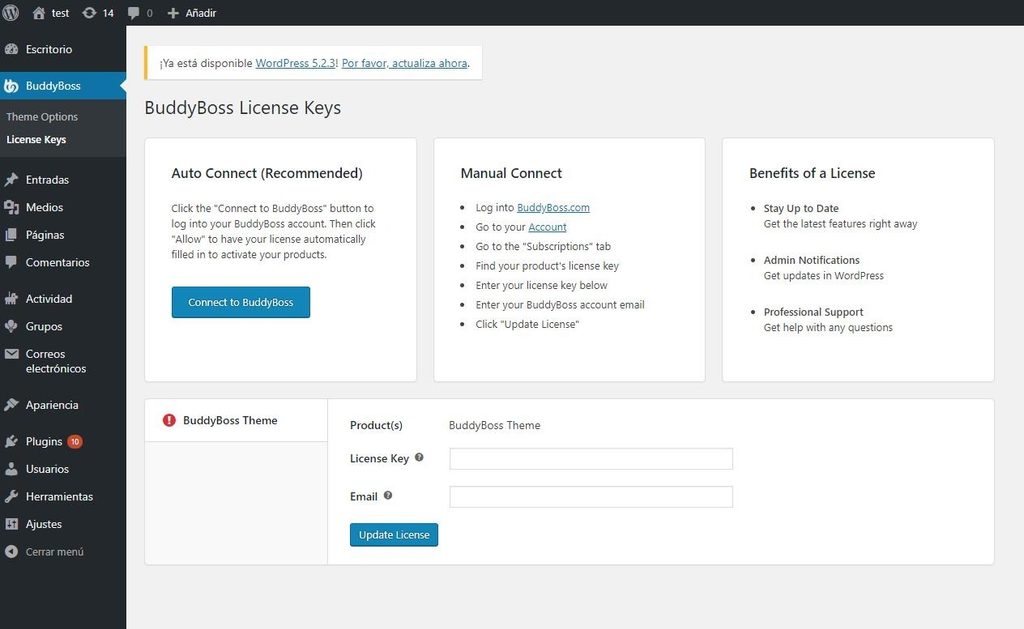
BuddyBoss Theme is a premium product, so you need a valid license to use it. If you’re looking for a more flexible way to access premium WordPress themes and plugins, PluginPro offers affordable plans, including a $4.5 per-item option and membership packages for users who need multiple products.Check the available PluginPro pricing plans to find the option that best fits your needs.
4.4 How Do I Update BuddyBoss Theme?
Before updating BuddyBoss Theme, create a backup of your WordPress site. When a new version is available, go to your WordPress dashboard and open the theme update section. Select BuddyBoss Theme and complete the update.
If you use a BuddyBoss Child Theme, your customizations should remain separate from the parent theme files. After updating, check your site’s main pages, navigation, and community features to make sure everything is working correctly.
4.5 Is BuddyBoss Theme Compatible With LearnDash?
Yes. BuddyBoss Theme is designed to work with LearnDash for websites that combine online courses with community features. You can use BuddyBoss for the site’s design and community experience while LearnDash handles course management.
6. Conclusion
Installing BuddyBoss Theme doesn’t take many steps, but using the correct files and setting up the theme and BuddyBoss Platform properly can help you avoid common issues. Once everything is installed, you can customize your site, add the features you need, and get your community ready for visitors.
Once your BuddyBoss site is set up, you can explore additional WordPress themes and plugins on PluginPro if you need to extend your website.